Node Home Project Setup
Each ESGF-CoG node has a “home” project, which is the top-level project that users are redirected to when they access the Node’s top-level URL. Typically, the home project describes the Node itself, the institution hosting the Node, and the main goals/activities of that Node. When an ESGF Node is installed from scratch, a stub project called “TestProject” is created and configured as that node home project. You will want to replace it with a project named more appropriately for your Node, following the steps below (as you are logged in as Node administrator):
Step 1: Register a new project
Click on the “Register a New Project” link (Figure 1) in the upper right corner of CoG.
You must populate at least the following mandatory fields (all other fields can be populated and changed at a later time):
Short Name: choose a short name (no spaces) that is unique for your node. Theconvention for ESGF Nodes is to choose a home project name of the form “ESGF-XXX” where XXX is a unique name for your ESGF Node and institution. Examples: “ESGF-LLNL” (for https://esgf-node.llnl.gov/projects/esgf-llnl/) or “ESGF-GFDL” (for https://esgdata.gfdl.noaa.gov/projects/esgf-gfdl/). The home project short name is the only attribute of a project that can never be changed, since it enters (in lower case form) in ALL URLs for that project. If you decide you don’t like the name you have chosen, you will have to create a new project, transfer all content from the old to the new project, then deleted the old project.
Long Name: the project long name will appear as the title of the node home page. This can be changed later using the “Update Project” link in the left “Administrators” menu. Example: “ESGF-LLNL”.
Description: the project description will be used as the initial content of the node home page. This can be changed later by editing the project home page via the wiki functionality. Example: “Welcome to the ESGF Node at NASA/JPL”.
When done, click “Submit”.
For more detailed instructions: View tutorial with screenshots

Figure 1: Screenshot of the upper corner of a node showing the “Register a New Project” link.
Step 2: Approve the new project
All CoG projects, before being accessible, must be approved by the Node Administrator.
While you are still logged in as Node Administrator, click on the “CoG Admin” link (Figure 2).
On the list of projects, locate the project you just created and click on the corresponding “Update” link.
Check the “Is Active?” checkbox to make the project accessible.
Click “Submit”.
Optionally, you may want to check “Is Private?” to prevent the project from becoming public before if you are satisfied with its initial content.
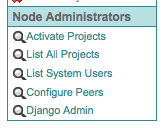
Figure 2: Screenshot of the lower left portion of the left navigation bar showing the “Activate Projets” link (valid in version 3.1 or later).
Step 3: Configure the new project as the Node “home” project
To make the new project the node home project:
edit: /usr/local/cog/cog_config/cog_settings.cfg
change: HOME_PROJECT = TestProject
to: HOME_PROJECT = <home project short name>
example: HOME_PROJECT = ESGF-LLNL
Since you are editing this file, you may also want to:
Choose a new SECRET_KEY (any long, random, unique sequence of characters) : a random string is generated when CoG is first installed, but you may want to replace it with your own long sequence of random characters (any character is allowed).
Setup your TIME_ZONE (any valid time zone name supported by the Python datetime package - see wikipedia page for full listing).
Step 4: Save the file and restart the ESGF Node.
Check that the node top-level URL: https:/// redirects to: https:///projects//.
Step 5: Edit the node “home” project “home” page
At this point, you may want to start populating the content of the home page for your node home project.
For convenience, we have created an example of a generic ESGF Node home page that you are welcome to use as a starting point - see this ESGF Node Home Page Example. If you like the example, you can use your browser to view the HTML source, and cut-and-paste the HTML code (between the “START ESGF HOME PAGE EXAMPLE” and “END ESGF HOME PAGE EXAMPLE” lines) into the wiki content of your Node home page. Note that you will have to manually download the banner image to your desktop, and upload it to your project using the wiki. Also, the template is formatted for the “Main Content, Right Widgets” layout (selectable when you update the page in the wiki). Then, keep using the wiki to further customize the home page with information specific to your Node.
For help in using the wiki, formatting images etc, there is a list of web-based tutorials to help you get started.
For live examples of customized ESGF home pages, see the ESGF Node @ NOAA/ESRL and ESGF Node @ LLNL.